Manual installation instructions for non-scripted install of QWS3270 Secure including printer setup

WARNING: If you receive a Security Alert that your current security settings do not allow this file to be downloaded.
Click on Tools > Internet Options
Scroll down to the security heading, and check the box to Allow active content to run in files on my computer.
After installing QWS3270 Secure, you can uncheck this option if you wish.
a. Accept the license agreement.
b. Accept the TYPICAL install.
2) Start QWS3270 Secure by doing the following:
a) Start / Programs / QWS3270 Secure / QWS3270 Secure
b) The New Session wizard will start.
c) Click Next.
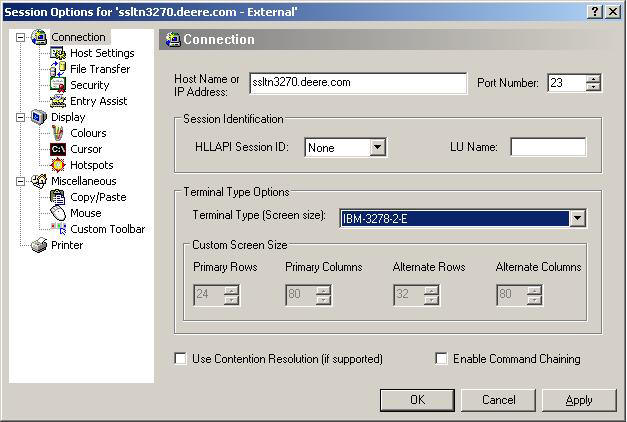
d) Enter Host Name: ssltn3270.deere.com
e) Leave the port number: 23
f) Select the terminal type that you prefer. g) Enter a name for your session like: Deere Host.
h) Click Finish


3) From the QWS window click QWS3270 > Connect and click Edit.


a) Click File Transfer from the menu on the left and select the TSO radio button.


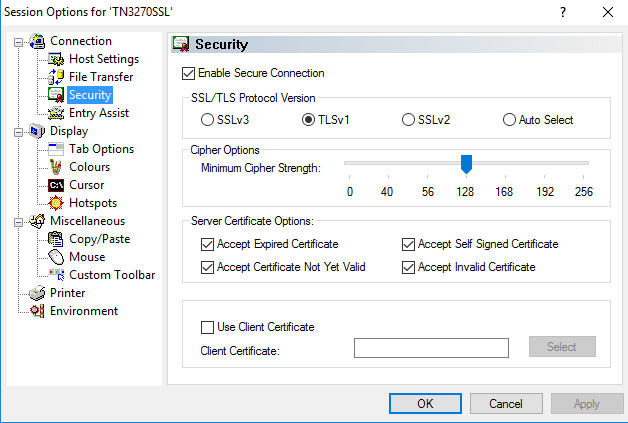
b) Click Security from the menu on the left.

c) Check Enable Secure Connection, TLS Protocol and ALL the Server Certificate Options are checked.

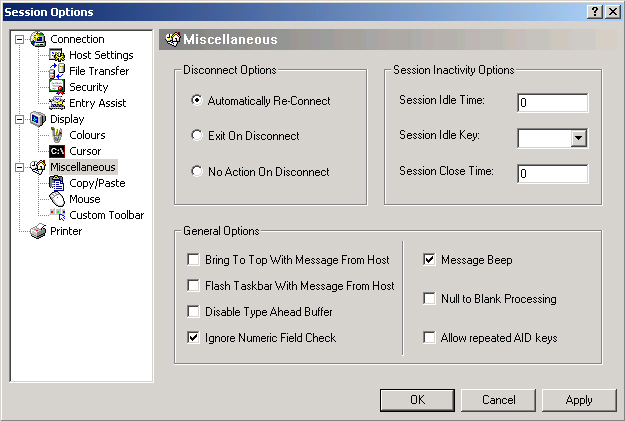
d) Click Miscellaneous from the menu on the left.


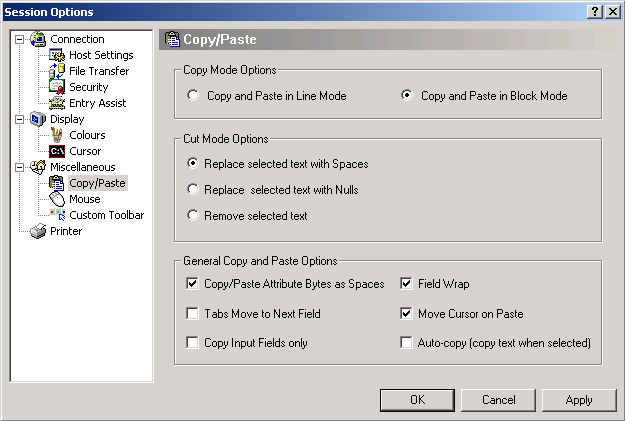
e) Click Copy/Paste from the menu on the left and click the radio button for Copy and Paste in Block Mode.

f) Click Mouse from the menu on the left

g) Click OK.

h) Click Connect and your terminal session should come up.
4) (Optional) To Configure QWS3287 Print, do the following:
a) Start > Programs > QWS3270 Secure > QWS3287 Printer > Click Host > Connect & click Add Session.

b) Type Printer1 in the Enter name for new session field and click OK.

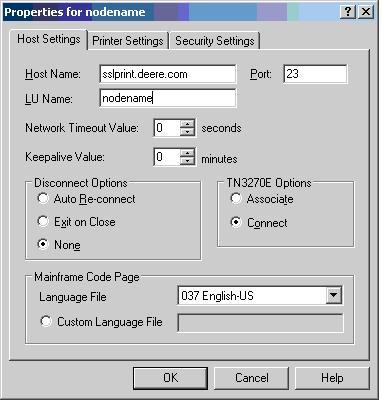
The following screen will display:


  • For Host Name enter: sslprint.deere.com
  • Leave the port number: 23
  • In LU Name enter the 8 character name of the PC Attached Printer that your Online Coordinator assigned you.
  • In TN3270E Options select the Connect radio button.

  • 5) Eliminate printing unnecessary blank pages, and Print Directly to the printer (required for AFP print support):
    a) Click The Printer Settings tab.

    b) Click Print directly to printer, and uncheck Add blank page at end.

    c) If you wish to print to a printer other than the windows default printer, select the printer from the dropdown box.

    d) Click The Security Settings Tab.


  • Make sure Enable Secure Connection is checked, TLS Protocol and check all the Server Certificate Options.
  • e) Click OK, click Connect and your session should come up.

    6) Click Options > Startup Options > Start at 'Connect to Host' dialog. This will eliminate one step each time you start your printer session.


    Last Modified: 06 April 2011